EarlyWatch Alert generation is a service provided by the SAP Solution Manager that provides technical insight in the operation of SAP systems. It uses general recommendations and KPI from SAP to determine the health of the SAP system. Focus is mostly on measuring the capacity of the system and showing possible issues that might jeopardize operation in the future.
EarlyWatch Alert generation has to be configured before related functionality such as Service Level Reporting can be used. This document describes the configuration of EarlyWatch Alerts for ABAP systems only.
• Solution Manager 4 basic configuration has been performed (see reference IMG)
• The system for which the EarlyWatch Alert are to be generated it connected to the Solution Manager as per my previous blog posting ‘Attach SAP System to Solution Manager’( http://sapbasistechnical.blogspot.in/2012/05/sap-basis-technical-attach-sap-system.html )
• On the system for which EarlyWatch Alert generation is to be configured, the latest ST-PI and ST- A/PI have to be installed
• Service connection from the system for which EarlyWatch Alert is to be created to SAP has to be configured (i.e. transaction OSS1 has to be configured).
Choose the ‘Call Service Data Control Center’ button. This logs on to the remote system and launches transaction SDCCN there


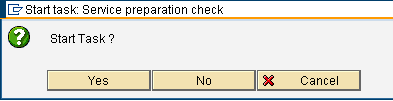 Choose ‘Yes’.
The settings for the preparation tool are shown

The default values are fine. Choose ‘Save’.

‘Addons & Upgr’


Now the ‘After impl’ is green too. Choose ‘OK’ to continue.
Now, all items should be green. If it does, leave the screen and choose ‘Yes’ on the following pop-up

‘Run Task Periodically’ button. This will make the task run daily. If no RFC destination to the Solution Manager is shown, proceed as shown in the appendix in sections 3.3. Note: you can choose any start time.
In principle, the configuration of Early Watch Alert reports is now done. However, it is wise to try and generate a report manually at this time.
Manually create an EarlyWatch Alert report
Log on to the Solution Manager and call transaction SOLUTION_MANAGER. Choose the landscape containing the system for which EWA needs to be created. Go to ‘Operations’ ‘Solution Monitoring’ ‘Early Watch Alert’.


Choose ‘Task’ ‘Create’

Double-click ‘Refresh sessions’
 Choose to schedule ‘Now’. Also, choose the RFC connection to the Solution Manager system as the
Target RFC destination. Choose ‘Continue’

 The task is scheduled to start. Choose ‘Refresh’ to update the status. Once it is done, automatically EWA entries are created.
Start EWA data collection manually


In the overview of EWA tasks, a new entry is created. This entry means that data has been received from the system and is ready to be processed. Click this entry


EarlyWatch Alert generation has to be configured before related functionality such as Service Level Reporting can be used. This document describes the configuration of EarlyWatch Alerts for ABAP systems only.
Pre-requisites
To perform the steps as indicated in this document, the following pre-requisites have to be fulfilled.
• Solution Manager 4 basic configuration has been performed (see reference IMG)
• The system for which the EarlyWatch Alert are to be generated it connected to the Solution Manager as per my previous blog posting ‘Attach SAP System to Solution Manager’( http://sapbasistechnical.blogspot.in/2012/05/sap-basis-technical-attach-sap-system.html )
• On the system for which EarlyWatch Alert generation is to be configured, the latest ST-PI and ST- A/PI have to be installed
• Service connection from the system for which EarlyWatch Alert is to be created to SAP has to be configured (i.e. transaction OSS1 has to be configured).
Choose the ‘Call Service Data Control Center’ button. This logs on to the remote system and launches transaction SDCCN there


Choose ‘Yes’.
 Choose ‘Yes’.
The settings for the preparation tool are shown

The default values are fine. Choose ‘Save’.

Note: all items should be green. Note 69455 might be red, but that is easily fixed. Choose the button
‘Addons & Upgr’

Choose ‘Procedure after addon implementation’


Now the ‘After impl’ is green too. Choose ‘OK’ to continue.
Now, all items should be green. If it does, leave the screen and choose ‘Yes’ on the following pop-up

Schedule regular retrieval of sessions
The system for which Early Watch Alert reports should be created, will have to check at the Solution Manager for new reports to generate daily. For this, a task will be scheduled. From the menu choose ‘Task’ --> ‘Create’.
From the menu choose ‘Task’ --> ‘Create’
 Double-click ‘Refresh sessions’.

From the menu choose ‘Task’ --> ‘Create’


Choose the RFC connection to the Solution Manager as the ‘Target RFC Destination’. Also, click the
‘Run Task Periodically’ button. This will make the task run daily. If no RFC destination to the Solution Manager is shown, proceed as shown in the appendix in sections 3.3. Note: you can choose any start time.
In principle, the configuration of Early Watch Alert reports is now done. However, it is wise to try and generate a report manually at this time.
Manually create an EarlyWatch Alert report
Log on to the Solution Manager and call transaction SOLUTION_MANAGER. Choose the landscape containing the system for which EWA needs to be created. Go to ‘Operations’ ‘Solution Monitoring’ ‘Early Watch Alert’.

Choose ‘Create Service’.

Choose the system the system for which the EWA needs to be created. Choose ‘Create’.
Choose ‘Task’ ‘Create’

Double-click ‘Refresh sessions’
 Choose to schedule ‘Now’. Also, choose the RFC connection to the Solution Manager system as the
Target RFC destination. Choose ‘Continue’

That’s nice. Now, choose ‘Continue’.


The new EWA is added to the task list. Click the SAP Early Watch Alert link.

Choose the ‘Call Service Data Control Center’ button. This logs on to the remote system and launches transaction SDCCN there

Refresh sessions
Start EWA data collection manually
These services will run periodically. However, to check the creation of EWA, creation of an EWA will be triggered immediately. Choose the first row with an EarlyWatch Alert task. Then choose ‘Edit’ ‘Start now’


From transaction SDCCN, choose ‘Goto’ --> ‘Settings’ --> ‘Task-Specific’

 No RFC destinations are shown. Go to change mode and click the ‘Add RFC destination’ button.


Appendix: add the Solution Manager RFC to the SDCCN
From transaction SDCCN, choose ‘Goto’ --> ‘Settings’ --> ‘Task-Specific’

Click on the table button in the ‘RFC Destinations’ section.


Give the RFC destination a name and choose the RFC connection to the Solution Manager.

The RFC destination is now shown in the list. Now, set it as the master system, so it will be default for all manually created sessions. Click the ‘Set Master SAP Solution Manager system’ button.
Choose the RFC connection to Solution Manager as the Destination.
The Solution Manager can now be accessed from SDCCN. Click OK to continue.
Optional: Automatic sending of reports by e- mail
Prerequisite

The task has started execution. Note it might run for 30-60 minutes!
When it is done, it will be removed from the ‘To do’ tab. Choose ‘Back’ to leave the satellite system. Choose ‘Back’ again to see the list of EWA services in the Solution Manager
Start processing of received data manually
In the overview of EWA tasks, a new entry is created. This entry means that data has been received from the system and is ready to be processed. Click this entry
The processing of the received data will also start automatically at some point in time. But for testing purposes, the processing will be triggered manually. Choose ‘Start service processing’.


Choose ‘OK’ to continue.
The processing will run for some time. When it is done, the icon before the Early Watch Alert will change to a value indicating it’s status. The yellow icon means that issues were found in the EWA. Choose the Word icon to view the EWA.


